Send a shout out!

U guys are so so amazing you have put such great effort into all of these prizes - jayleeb I'm Emma I'm 9 I've been reading your magazines since I was 4 I think - Emma hi TG I really hope I could win the kobo comp🙏🤞 because my birthday is coming soon, and the comp is awesome🤩😍😃😀! - Jacinta B Hey! Shout out to my besties! Skye and Ava! - Alyssa Hey TG shout out to welcome Sophia the new junior writer congrats! But I miss Avani and Bailey they were cool big fan of urs you slay the day bye love ur BIGGEST FAN EVA - ❤️❤️❤️❤️Sophia - Sophia h heyyyyyyy tg I'm tiara I really luvvvvvvvv the books omg I have 22 of the books cause they are veryyyy good you guys always make me happy because they are literally Soo good #slay and I love the challenges#favwebsite - tiara Hey TG! I love your mags sm, but I was wondering if you could please add more Dua Lipa. Thanks!. - Myra Hi guys would it be possible to add shorts of youtube dances please - Helena I ❤️‍🔥❤️‍🔥❤️‍🔥❤️‍🔥❤️‍🔥❤️‍🔥 your mags and if you’re reading this you’re amazing - Izzy???? Hi total girl , I haven’t read a lot of ur magazines but they are really slay. - Terri
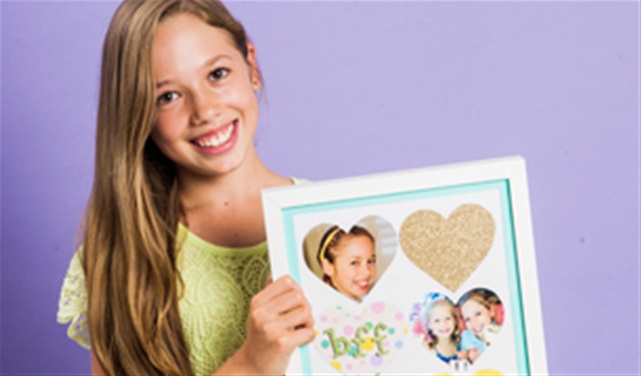
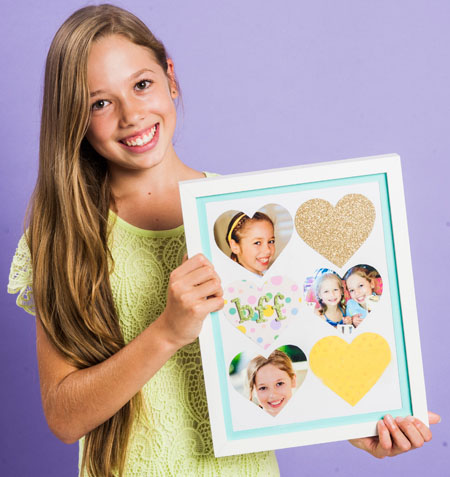
DIY Loveheart Photos

DIY Loveheart Photos

Create this pretty keepsake frame!
DIY Heart Photo Board Total Girl

What you need
  • Frame
  • Photos, cut-outs and scrapbook paper
  • Heart template
  • Glue
  • Pencil
  • Scissors
  • Paint
  • Paintbrush
  • Self-adhesive letters
What to do:

  1. Draw and cut out a heart on a piece of cardboard. Check that your heart will fit inside your frame before you begin cutting.
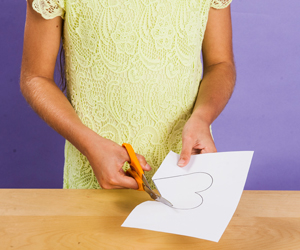
    DIY Heart Photo Board Step 1
  2. Gather six of your fave photos, magazine pictures and scrapbook paper. Position the heart template over the centre of your picture and using a pencil, lightly trace around the heart. Cut out the heart and repeat with the rest of your images.
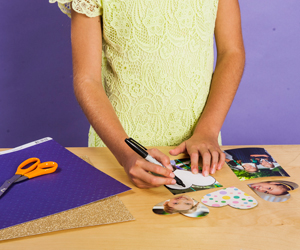
    DIY Heart Photo Board Step 2
  3. Open the back of your frame and remove the inserted piece of paper inside of the frame. Paint and leave to dry.
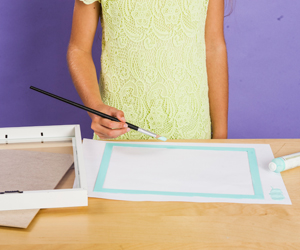
    DIY Heart Photo Board Step 3
  4. Position the hearts on the coloured card roughly 3cm apart with two on top and two below. Once you’re happy with their position, glue them down and insert cardboard back into the frame. Stick on the self-adhesive letters to make up your word on the glass over the top of a heart or two.
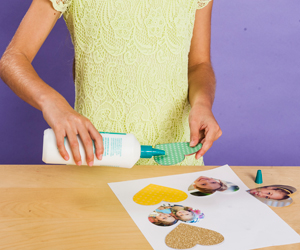
    DIY Heart Photo Board Step 4
Picture perfect!

Comments:

20
Charlotte
My parents loved my artwork
29/9/2021 12:12:49 PM
dakota
well it made me even bored
29/2/2016 2:26:35 AM
bianca
wow i love it that was so cool
24/12/2015 1:55:59 PM
tabitha-love
OMG it's so awesome hanging on my wall <3
27/8/2015 1:43:49 PM
shakira
awesome
7/4/2015 12:05:53 AM
Izzy
Cool I love it
3/3/2015 4:03:57 AM
kailey
I love it. It is so cool!!!!!!!!!!!!!!!!!!!!!!!!! it is #1
4/3/2014 10:43:57 PM
Lydia
That is sooooooooooooooooooooo cooooool :P :)
24/1/2014 6:23:26 AM
Lusi
I love it...and I put heaps of pictures of my family and friends!
29/12/2013 7:41:28 AM
dinah
cool
22/11/2013 9:59:33 AM
Skyla
I love it I'm so using this idea for a gift for my BFF
12/10/2013 11:39:29 PM
Samira
Wow!! I love it!!!
12/10/2013 10:26:46 PM
mary
it so pretty
11/10/2013 11:11:55 AM
zozy
wowwwwwww its so good you should be a artist
4/10/2013 7:11:21 AM
Alex
realy cool and i did it and itsthe best
1/10/2013 1:52:42 AM
Kyah Emily
I think it is so cool!!!!!!!!!!
27/9/2013 12:48:07 PM
Natalie
I am sooooooo going to try this! iT LOOKS AWSOME.
13/9/2013 5:53:36 AM
liz
It is so soooooooooo cool I did it last week and it turned out really good
7/9/2013 6:32:28 AM
Jessica W
that looks awesome I cant wait to try this cool craft idea out !!!
31/8/2013 10:46:31 AM
Coleen
I Love It...
27/8/2013 1:19:00 PM
TG Poll
Which piece of jewellery can you not live without?
Rings
Earrings
Bracelets
Necklaces